Showing posts with label crafts. Show all posts

Tuesday, April 5, 2011

Painted Easter Eggs

Around Easter time as a child, I remember watching my mother use a needle to drill a small hole in either end of an egg. She would then blow the contents into a dish, leaving a light and delicate shell. We would paint the shell in all sorts of styles and patterns; the possibilities were endless! I think projects like these were a primer for what I (with my mother's assistance) would do later on: painting life-sized fiberglass horses for a public art project. When almost anything can be your canvas, limits are few.

For centuries, egg decorating has been a staple in the springtime. Painting and decorating hollowed-out eggs is really fun and, I believe, develops one's patience. I will outline below the tools and procedure needed to create a cute decoration for your home or great gift for a friend.
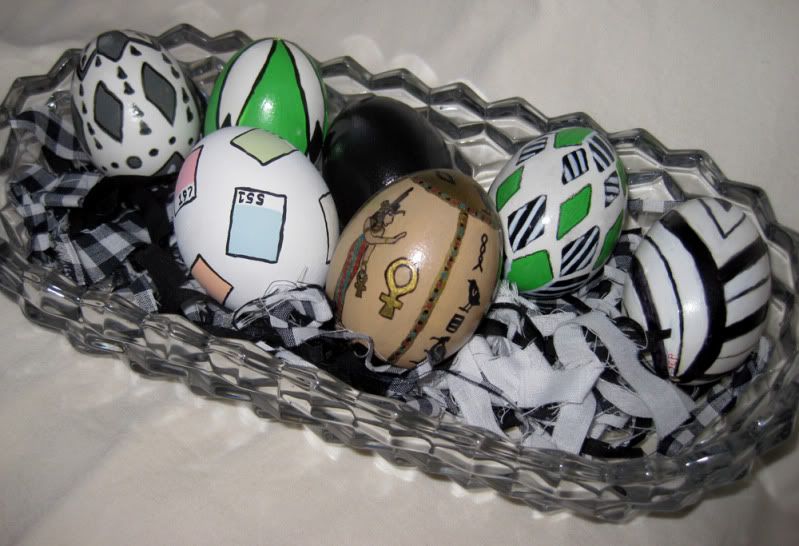
The black, green, and white eggs along the back were done by my mother.
I painted the ancient Egypt egg in my late teens and I did the Pantone chip egg this year.


What You Need:
egg (any type will do, but I prefer plain white large eggs.)
needle (upholstery or leatherworking needles are great, easier to hold and stronger)
bowl
paper towels
acrylic paints
paint brushes
thread and/or small guage wire
spray sealer/fixative
egg cup, pill bottle, or small sturdy object to hold the egg while drying
Optional
hair dryer
glue on jewels
scrapbooking decorations (stickers, embellishments)
beads
beading thread or cord

What To Do:
You will be putting your mouth on the egg, so wash the egg first with soap and warm water. Dry it well and use the needle to slowly poke holes at either end of the egg. I usually do this gradually, making small holes side by side until I make one large enough to allow the insides to escape. Once you start blowing on the egg, you may have to make your hole larger if nothing comes out.

Keep a towel handy to wipe away dampness along the way. With the egg over a bowl to catch the insides, blow through the hole on one end. You may have to use your needle or some small wire to loosen the insides and help break up the yolk. This process isn't swift, so be patient. You will know when the egg is hollow.

Use your faucet with a small stream and try to get some water inside the egg. Hold your fingers over the holes and shake. This will help to rinse out as much of the egg liquid as possible. Blow the water out. You can repeat this process until the water comes out relatively clear. Set the egg, one of the holes down, on some paper towels (like a nest) to drain further. I usually let them drain for 24 hours. Remember to use the egg contents for something great like an omelet or perhaps some cupcakes or cookies!

Once the egg has drained, it's time to decorate! Base coats aren't necessary, but I usually do a coat of white or black acrylic depending on the design I intend to implement. You will find that you cannot paint all of the egg at once (that patience thing I mentioned). Do one half at a time, setting the egg in a cup or rest on the mouth of a pill bottle to dry. Acrylic craft paint usually dries quickly, so you shouldn't have to wait long. If you desire, you can use a hair dryer on cool to speed the process.

If you choose, you can decorate your egg with pre-made embellishments, like the ones used for scrapbooking. Small, flat-backed items like buttons and jewels are also an option. Stick them on a flat-color painted egg for a striking effect. But keep in mind, eggs aren't flat like scrapbook pages. The smaller the items the better since larger items may not lay flat against the round surface.

Once you're satisfied with your egg, you can string some small wire through to give you something to hold to and spray coat the design with fixative. Matte finish is usually best and the easiest to work with. If you've used scrapbook or other elements as a design, this step isn't recommended. You may choose to spray coat the egg before attaching embellishments however. The spray coat helps reinforce the egg a bit, but remember, this is an egg and it is not indestructible. You may break a few, but if you're careful, you won't lose many.

There are many ways to display your eggs. You can string them like ornaments, set them one by one on a mantel, table, or windowsill, or put a group of them in a basket. You may find that once you've made one, you have the compulsion to make more. They make great hand-made gifts and can be reused from year to year if sealed properly and packed carefully. This is a fun craft that really gets the imagination churning. Pick up an egg and... see what hatches!

Tuesday, September 14, 2010

A Bright Place to Lay Their Heads

I was browsing blogs one day and came across a post on Made about ConKerr Cancer: A Case for Smiles. The fabric used in the post caught my eye and I read the post, not really knowing what it was about. When I learned about ConKerr and what they do, I decided I had to help. ConKerr Cancer distributes handmade pillowcases to children in hospitals. Those pillowcases help to bring a little warmth and comfort in a scary time.

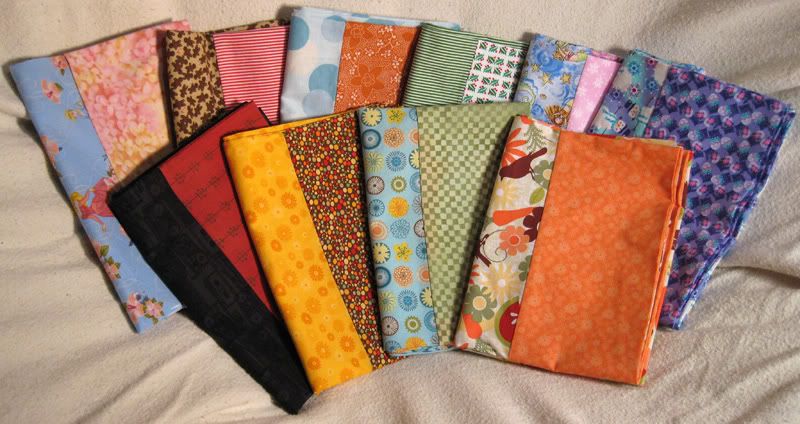
I took down my measurements and went shopping, eventually buying enough fabric for ten pillowcases. I used the 'hot-dog' method, something you can find on ConKerr's site. The tutorial on Made is great too. Once I got started, the cases became easier and easier to construct. I loved watching them come together.

If you sew, even if you're just starting out, these cases are a relatively easy project that really warm the heart. Visit ConKerr's site, linked above, for complete details and a list of representatives in your area. They made me smile and I hope they will do the same for the children.

Wednesday, September 8, 2010

Fashion Frankenstein: New Life for Old Clothes

In an earlier post, I discussed how unexpected things can be repurposed as storage. But that's not as far as repurposing goes. What happens when you get a stain on your favorite shirt or there's a rip in those jeans you now can't bear to wear in public? What about thrift shopping? Can a $2.50 sweatshirt really get a new life? I say yes!

Sometimes I grab something like a spent pair of my husband's jeans or a team sweatshirt from Goodwill and stare at it. I literally eye-ball the thing with a vengeance, trying to see what's 'inside' it. Just because something started as pants or a shirt, doesn't mean it can't be something else. After all, these things are simply pattern pieces cut from fabric just like anything else. 

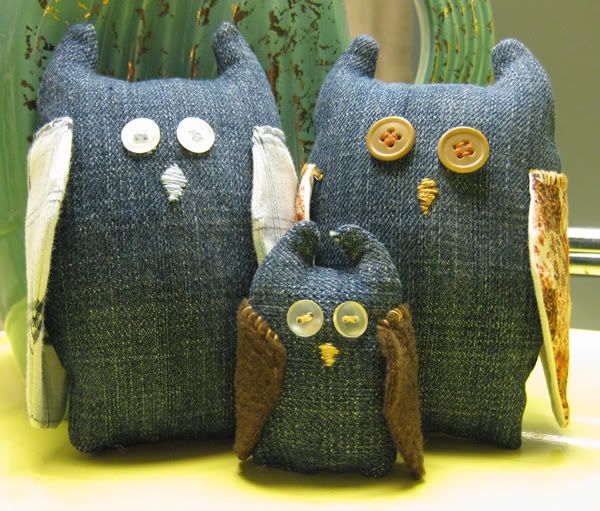
Jeans, paired with sewing scraps, perhaps those from an old button-down shirt, can become a stuffed animal like these owls.

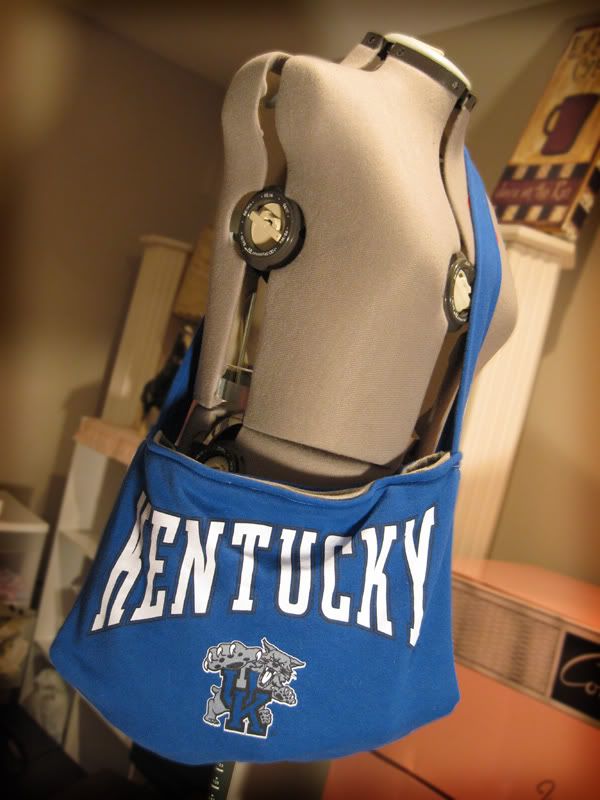
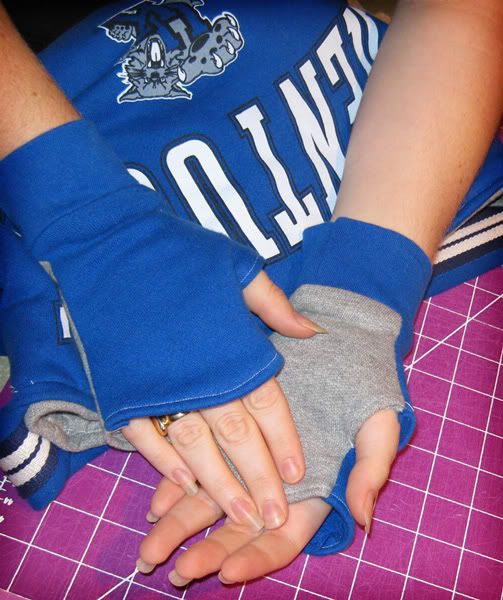
A sweatshirt, paired with another one for lining, can be deconstructed and given a new life as a shoulder bag. This purse had a material cost of under $10. I even used the left-over scraps and stretchy band from the bottom to make some fingerless mittens. They're toasty!

So what do you have lying around? Do you have some fabric that is currently living life as an old skirt with a bleach spot or a pullover with a tear. Is it secretly dreaming of being something more? Have some one-on-one time with your old clothes, ask them what they want to be, and make it happen! If you doubt your creativity at first, there are a number of sites and blogs with patterns and instructions. Do a search and go from there. But the next time you think of tossing out those clothes, don't; let them be reborn!

Wednesday, August 25, 2010

Acorn Ornament


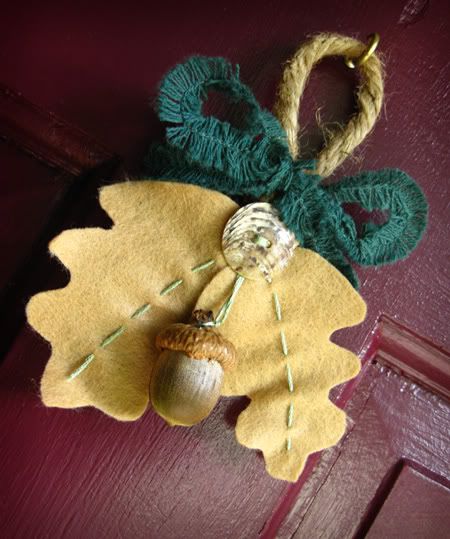
When I craft, it's a haphazard process of found objects and random purchases. The September issue of Better Homes and Gardens featured a great autumn décor idea: using acorns as 'ornaments' for a centerpiece. They painted their acorns, but when I found some on a walk, I couldn't bear to cover their natural beauty. I stared at the pile of them trying to come up with some crafty way to display them. And thus this project was born.

What you'll need:
  • acorns with caps and a bit of stem (one for each hanging, two if you're adventurous)
  • felt (I used a camel color to coordinate with my thread and ribbon. See below for my color palette.)
  • oak leaf pattern (cookie cutters work really well)
  • embroidery floss in the color of your choosing (mine is Sullivans #45118)
  • ribbon, wired or regular (I found this great frilly peacock green stuff at Michaels in the $1 bin)
  • heavy twine or small rope (This is Natural Jute 4 ply from Hobby Lobby)
  • fun medium to large buttons (these are natural shell buttons from Hancock Fabrics)
  • large needle
  • scissors
  • fabric pen, marker, or pencil

I first cut out the oak leaves. I used two of my cookie cutters in graduated size. Trace around the pattern then cut inside your lines. You don't want marker-tinted edges showing up in the final product. Once you've cut out your leaves, thread your needle with a length of floss. I did not separate my floss because I wanted a chunky look. Make a line of large, loose stitches from top to bottom of the leaf. Before you tie it off, cinch the thread a little to crinkle the leaf ever so slightly.

Next, cut a small length of twine and make a loop. Stack the leaf stems on top of the loop bottom and a button over where they all meet. Using the same thread, stitch through the twine, overlapped leaves, and button a few times. Make sure everything's secure. I didn't cut the thread before pulling it through the stack again, this time under the button instead of through it. I then tied the thread in a double knot around the stem of the acorn, making sure it hung just a bit under the button. We don't want to hide our pretty button! I stitched back through the felt and twine again, making sure the threads holding the acorn were equal. Tie off your thread on the back and trim.

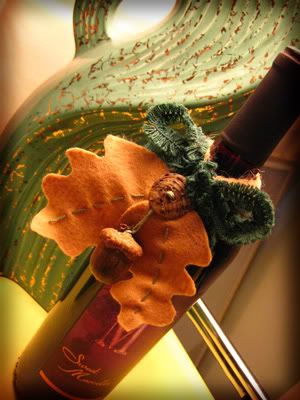
Lastly, I cut a length of ribbon and tied it in a bow around the twine loop just above the button and leaves. Your speedy autumn ornament is finished! These are great for door décor or to hang in your office to bring in the beauty of fall. Use them to spice up a gift box or bag. The loop also hangs well on the neck of a wine bottle. For something a little different, use them as Christmas decorations. Who says acorns and leaves are just for autumn? Beauty is for all seasons!

Thursday, August 12, 2010

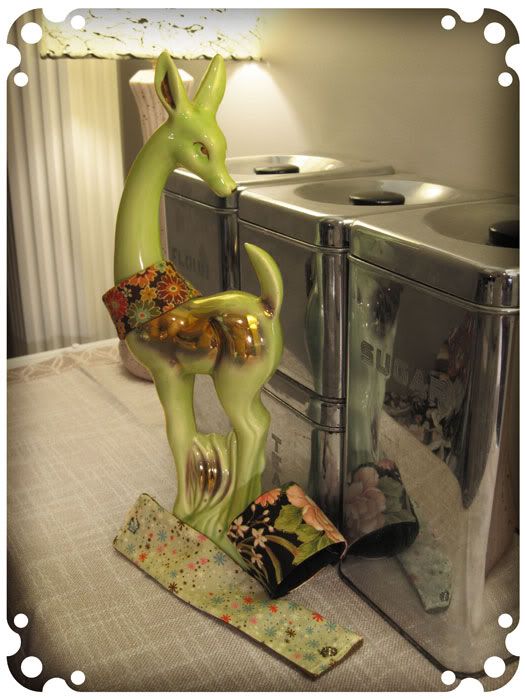
Scrap Fabric Bracelets

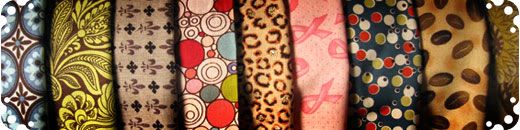
When I was a small child, I played under the table while my mother used the sewing machine. At times, I would become enthralled with the pedal and chance to push it. She would wail at me to stop as the needle worked a line of stitches where they didn't belong. As soon as I was able to learn, Mom taught me to sew. Ever since, I've been tinkering with fabric and embroidery. Though I don't do a lot of garment projects, I do like to craft with fabric. As it is with fabric work in general, there are times when you wind up with strips that get thrown away or pieces of torn clothing you meant to fix or reuse that gather dust. I thought, "There has to be a way to use this stuff." These bracelets are an answer to that quandary.

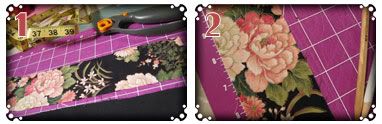
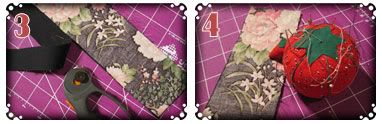
I started with a strip of fabric roughly 2 1/2 inches wide and a little over 8 inches long. It's best to work with small-print calicoes or something that still looks good when you see only a small sliver. Cotton is always a safe bet as it is one of the simplest fabrics to work with. I chose to back this particular cotton with black duck canvas, but any moderately heavy fabric will work. For my first bracelet, I used a scrap from a pair of my husband's old corduroy pants. Note: if you plan to use denim, be aware, denim and some upholstery fabric will ravel. But using what you may have around is great. Reduce and reuse!

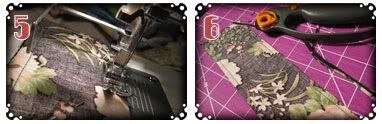
Measure your wrist with seamstress' tape or by wrapping a ribbon or string around your wrist, crimping, and laying along a ruler. You want a reasonably snug fit, so allow 1/4 inch for overlap and snaps. Mark your length with a pencil or fabric pencil. It's good to do this on the underside of the fabric just in case. Using your main fabric as a guide, trim your backing fabric. Turn both to face each other (back sides out), press with a steam iron if your fabric will take the steam, and pin the two together.

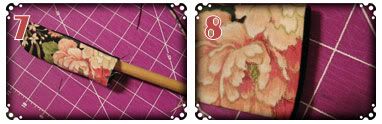
Using a plain straight stitch, sew the two long sides together leaving the ends open. Note: You can do this with a needle and thread, but a sewing machine will give you the strongest and most consistent results. I try to leave a small seam as to make the widest bracelet possible, but the width is up to you. Keep in mind, however, you will have to turn this back right side out and thin things are difficult to turn. When you've done the sewing, trim off the edges until you have roughly an 1/8 inch of fabric outside your seam.

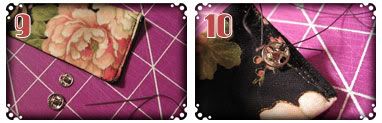
Now, turn the piece by folding the outside edges of the open ends down and pulling the inside out. I use an unsharpened pencil or dowel to help shove sometimes. When you've turned the 'tube' of fabric, press it flat. Turn the open ends inward to leave nice, clean edges. Stitch them closed. Remember, as always, back-stitching is your friend!

Using extra strong thread and a needle, sew on the two components to the snaps by hand. I find I'm not quite skilled enough with the sewing machine for that job. I used small snaps. One side of the snap will go on the top side of one end, the other side on the underside of the other end. When you've added your snaps, you're good to go! Some options would be to add embellishments like beads or buttons, but I like the simplicity of the fabric. There are a number of great patterned calicoes that speak for themselves.

When you sew, keeping small scraps may seem silly. But you never know what useful and fun things you may come up with that could make use of scraps. If you don't know how to sew, I suggest you give it a try. Fabric, needle, and thread can be as creative as paint, brushes, and canvas. This tiny project is a perfect way to get the most of fabric and wear inspiration not on, but as a sleeve!


My vintage ceramic deer modeling three of the bracelets I've made.