
Around Easter time as a child, I remember watching my mother use a needle to drill a small hole in either end of an egg. She would then blow the contents into a dish, leaving a light and delicate shell. We would paint the shell in all sorts of styles and patterns; the possibilities were endless! I think projects like these were a primer for what I (with my mother's assistance) would do later on: painting life-sized fiberglass horses for a public art project. When almost anything can be your canvas, limits are few.
For centuries, egg decorating has been a staple in the springtime. Painting and decorating hollowed-out eggs is really fun and, I believe, develops one's patience. I will outline below the tools and procedure needed to create a cute decoration for your home or great gift for a friend.
For centuries, egg decorating has been a staple in the springtime. Painting and decorating hollowed-out eggs is really fun and, I believe, develops one's patience. I will outline below the tools and procedure needed to create a cute decoration for your home or great gift for a friend.
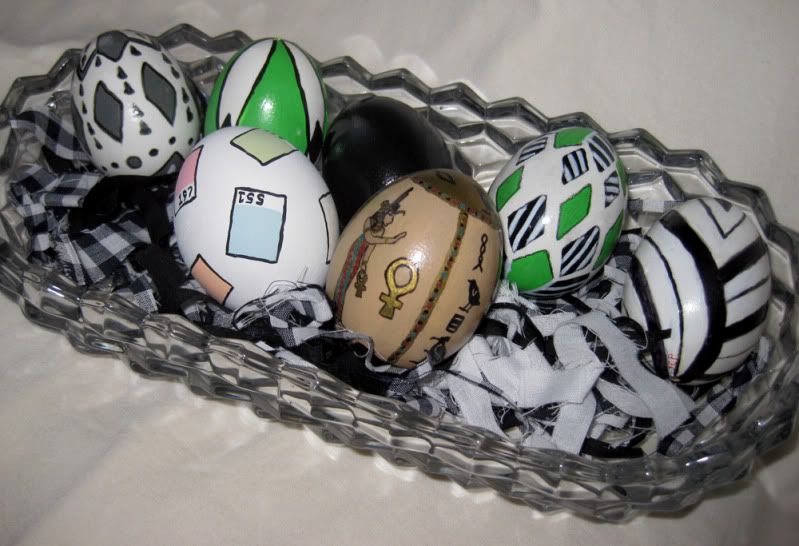 |
| The black, green, and white eggs along the back were done by my mother. I painted the ancient Egypt egg in my late teens and I did the Pantone chip egg this year. |
What You Need:
egg (any type will do, but I prefer plain white large eggs.)
needle (upholstery or leatherworking needles are great, easier to hold and stronger)
bowl
paper towels
acrylic paints
paint brushes
thread and/or small guage wire
spray sealer/fixative
egg cup, pill bottle, or small sturdy object to hold the egg while drying
Optional
hair dryer
glue on jewels
scrapbooking decorations (stickers, embellishments)
beads
beading thread or cord
What To Do:
You will be putting your mouth on the egg, so wash the egg first with soap and warm water. Dry it well and use the needle to slowly poke holes at either end of the egg. I usually do this gradually, making small holes side by side until I make one large enough to allow the insides to escape. Once you start blowing on the egg, you may have to make your hole larger if nothing comes out.
Keep a towel handy to wipe away dampness along the way. With the egg over a bowl to catch the insides, blow through the hole on one end. You may have to use your needle or some small wire to loosen the insides and help break up the yolk. This process isn't swift, so be patient. You will know when the egg is hollow.
Use your faucet with a small stream and try to get some water inside the egg. Hold your fingers over the holes and shake. This will help to rinse out as much of the egg liquid as possible. Blow the water out. You can repeat this process until the water comes out relatively clear. Set the egg, one of the holes down, on some paper towels (like a nest) to drain further. I usually let them drain for 24 hours. Remember to use the egg contents for something great like an omelet or perhaps some cupcakes or cookies!
Once the egg has drained, it's time to decorate! Base coats aren't necessary, but I usually do a coat of white or black acrylic depending on the design I intend to implement. You will find that you cannot paint all of the egg at once (that patience thing I mentioned). Do one half at a time, setting the egg in a cup or rest on the mouth of a pill bottle to dry. Acrylic craft paint usually dries quickly, so you shouldn't have to wait long. If you desire, you can use a hair dryer on cool to speed the process.
If you choose, you can decorate your egg with pre-made embellishments, like the ones used for scrapbooking. Small, flat-backed items like buttons and jewels are also an option. Stick them on a flat-color painted egg for a striking effect. But keep in mind, eggs aren't flat like scrapbook pages. The smaller the items the better since larger items may not lay flat against the round surface.
Once you're satisfied with your egg, you can string some small wire through to give you something to hold to and spray coat the design with fixative. Matte finish is usually best and the easiest to work with. If you've used scrapbook or other elements as a design, this step isn't recommended. You may choose to spray coat the egg before attaching embellishments however. The spray coat helps reinforce the egg a bit, but remember, this is an egg and it is not indestructible. You may break a few, but if you're careful, you won't lose many.
There are many ways to display your eggs. You can string them like ornaments, set them one by one on a mantel, table, or windowsill, or put a group of them in a basket. You may find that once you've made one, you have the compulsion to make more. They make great hand-made gifts and can be reused from year to year if sealed properly and packed carefully. This is a fun craft that really gets the imagination churning. Pick up an egg and... see what hatches!